This is Part 4 of The Complete Guide To Writing a WordPress Widget Series.
By now, we’ve read through the WordPress API, stubbed out our plugin, worked through the requirements, and come up with some paper napkin sketches of our administration panel.
At this point, we’re ready to begin implementing the plugin. For this iteration, we’re going to focus on getting a functional administration panel working.
1. Developing The Administration Panel
Recall from the previous post that the form function is responsible for drawing the administration panel so we’re primarily going to be working in that function, but we need to setup that function.
Recall that this is the first function in the file and is responsible for setting up everything else that the plugin will need. So your first function should look something like this:
[cc lang=”php”]
/**
* The widget constructor. Specifies the classname and description, instantiates
* the widget, loads localization files, and includes necessary scripts and
* styles.
*/
function Tweet_It() {
$widget_opts = array(
‘classname’ => ‘tweet-it-widget’,
‘description’ => ‘A simple widget for enabling users to broadcast a message to their Twitter followers that they are reading your blog.’,
);
$this->WP_Widget(‘tweet-it-widget’, ‘Tweet It Widget’, $widget_opts);
} // end constructor
[/cc]
Simply put, this provides the title and description for your widget and registers your widget with the WordPress widget system.
Now we can start looking at the form function. First, we need to setup get information about the current instance of the widget. Think of an instance as a collection of the current values for the widget.
[cc lang=”php”]
/**
* Generates the administration form for the widget.
*
* @instance The array of keys and values for the widget.
*/
function form($instance) {
$instance = wp_parse_args(
(array)$instance,
array(
‘use_custom_info’ => ”,
‘custom_message’ => ”
)
);
$use_custom_info = strip_tags(stripslashes($instance[‘use_custom_info’]));
$custom_message = strip_tags(stripslashes($instance[‘custom_message’]));
} // end form
[/cc]
Here, we’re having the WordPress API grab the values for the current settings and store them in our widget collection. We’re also using the PHP functions for stripping slashes and tags. This is a good practice for sanitizing stored data especially if you’re accepting input from your users.
Next, we can actually markup the look and feel of the administration panel. My final version is going to contain a single piece of text, a checkbox, a label, and an input field for the custom message:
[cc lang=”html”]
Use a custom message rather than default blog information?
/>
At this point, try playing around with a few values. Click the checkbox and save it, try typing some text and save it. Odds are, it’s not saving.
2. Saving Data
The last step in setting up our administration panel is to actually get the data to save for the given instance and that’s exactly what the update function is for.
[cc lang=”php”]
/**
* Processes the widget’s options to be saved.
*
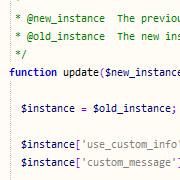
* @new_instance The previous instance of values before the update.
* @old_instance The new instance of values to be generated via the update.
*/
function update($new_instance, $old_instance) {
// TODO
} // end widget
[/cc]
Essentially, we need to read the new values that the user has provided and update them with the exisiting values. Thanks to the WordPress API, this is trivial:
[cc lang=”php”]
/**
* Processes the widget’s options to be saved.
*
* @new_instance The previous instance of values before the update.
* @old_instance The new instance of values to be generated via the update.
*/
function update($new_instance, $old_instance) {
$instance = $old_instance;
$instance[‘use_custom_info’] = strip_tags(stripslashes($new_instance[‘use_custom_info’]));
$instance[‘custom_message’] = strip_tags(stripslashes($new_instance[‘custom_message’]));
return $instance;
} // end widget
[/cc]
The update function accepts two arguments – a new instance and an old instance. We’re setting up a reference to the old instance using the instance variable and then reading values from the new instance.
Finally, we return them.
At this point, we’ve got a functional administration panel, though it could stand to be styled a bit better and we can introduce some newer functionality. In the next iteration, we’ll do that.
For now, spend sometime in the source code associated with this post (t’s a lot!).
If you’re new to this stuff, feel free to leave questions in the comments. Also, grab the latest copy of the plugin here.
Tom
I write both code and content for this team and I love every minute of it.


Some good stuff covered here. I’ve been through a few widget tutorials over the last day or two. I have to say your explanation turned on that light bulb for me.
Thanks so much!
Appreciate that, Lee – that’s what I was going for :).