You might think that publishing a book on Kindle is just as easy as taking a MS Word file and uploading it. Well, you’d be half right. You can upload a Word file, but you’d probably regret it.
Amazon supposedly takes “Word (DOC or DOCX), HTML (ZIP, HTM, or HTML), Mobipocket (MOBI), ePub (EPUB), Plain Text (TXT), Rich Text Format (RTF), Adobe PDF (PDF)” files, but most of these will either have formatting problems or won’t take advantage of Kindle’s ability to change font size. I’ve personally used html, mobi, and ePub and have had the best results with mobi.
So that begs the questions, “How do you get your draft into a mobi file?” There’s no “save for Kindle” option in either Word or Pages.
The Medium
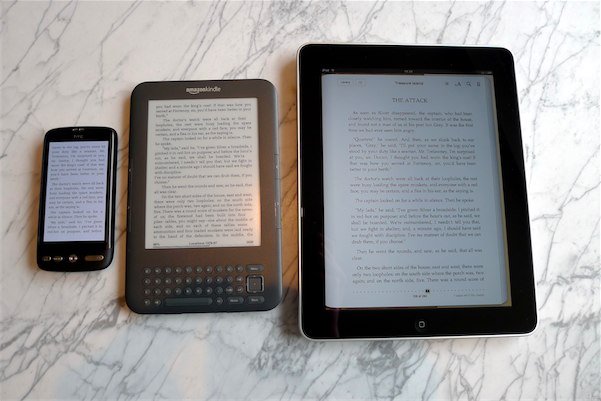
First, consider the medium. I’ve seen examples where people tried to create a perfect representation of a paper book for Kindle. Almost universally, these attempts were met with failure. Sometimes the failures were catastrophic like JK Rowling’s most recent book. Don’t try to create a beautiful print book … for Kindle. Without some major work, it’s going to be problematic because Kindle owners can tweak settings like font size and margin, throwing your design into chaos. For Kindle, simpler is better.
For My First Book
I spent a couple of months trying to figure out the best and most reliable way to do this on my Mac without buying software I didn’t already have.
For my first book, I did it all in HTML. As it turns out, the ePub format is just a varient of HTML, so what I know about web design translated fairly easily. If you take an ePub and change the extension to “.zip,” you can unzip it and look at the contents. Unfortunately, it’s not as straight forward as a website is, so while I’m glad I did it once, I was excited to find another way.
Form My Second Book
For my second book, I used PressBooks.com. It outputs an ePub file that worked really well with Amazon’s system. They’ve clearly done some work in the background to turn WordPress into a very capable ebook creation tool. The problem is that the software isn’t open source so it could go away at any time. I’d hate to depend on someone’s system only to have it go away.
Last summer, a friend approached me to figure out how to do it reliably. At the time, he was working with someone who wanted to be able to offer the service professionally as part of a larger business. That fell through, but left me with a process that starts with Pages and ends with a free piece of software called Calibre.
I create my manuscript anyway I want. Right now, I’m partial to blogging it, but I could also write it in Word, Writeroom, TextEdit, Pages, or any number of text editors or word processors.
How I Formatted My Book
I shifted the content to Pages for formatting. The secret here is to uses the “styles drawer” to format your whole document. This won’t work if you format each chapter title by hand, changing font, size, spacing, etc. You need to use separate styles for distinct pieces. “Chapter name” should be what you use for all chapter names and only chapter names. You should use “body” for body, and “author name” for author name.
At the end of each chapter, don’t hit enter a bunch of times to get to the next page. That will mess things up in the Kindle. Instead, go to “Insert” and select “Section Break.”
When you’re adding the table of contents, just select the place where you’d like it to be and go to “Insert” and click on “Table of Contents.” You might need to check or uncheck sections in the “TOC” subsection of the “Document” tab of the Inspector to make the table of contents look right.
Don’t forget to include the cover as the first page of the document. There are two types of images, floating and inline. The cover is the only image that can be floating. All other images must be inline although Pages will give you an error message if you use floating for any images during export, it’s okay if only the cover image is floating.
When the book is done, click on “file” and then “export.” There is an ePub tab. Click on it and fill in the information, saving the final document in a place where you’ll be able to find it.
If you just wanted your book to be on Nook, iBooks, Sony reader, etc., you’re done. Enjoy. If you’d prefer you book to be available to the other 90% of the eBook audience, you’re going to want to continue on.
Open the ePub in Calibre. Now, select your book in the Calibre library. Click on the “convert books” icon. In the window that shows up, first make sure everything looks right in the Metadata tab.
Next, select the Table of Contents tab. Check the very first choice “Force use of auto-generated table of contents.”
Head to the Search & Replace tab. Here’s the magic part that took me a while to figure out. Apparently, Pages adds in some formatting that Calibre doesn’t like. We need to remove it. To do this, add: style="white-space:pre-wrap" into the “Search Regular Expression” box, nothing in the “Replacement Text” box and click “Add.”
Click “OK” at the bottom and wait. It should tell you it’s starting the conversion and then tell you a few minutes later that it’s done. On the right hand side, under the cover of your book, click the words “Click to open” next to the word “Path.” That will take you to your newly minted mobi file.
Upload this file to Amazon KDP and in twelve hours or so you’re a published author. Congratulations. It sounds harder than it really is.
What book would you love to see on Kindle?
[Image via edvvc]
Paul Alan Clifford
Author of Podcasting Church (http://amzn.to/podcastchurch), Tweeting Church (http://amzn.to/tweetchurch), and The Serving Church (http://amzn.to/theservechurch). Paul blogs regularly at his technology in ministry blog: http://TrinityDigitalMedia.com and live-streams tech and creativity at http://ChurchTechCast.com


Great post! I am in the process of writing a few ebooks and was just starting to think about how to get it on the kindle…and then I come across this gem. Do you have any experience with writing an ebook through iBooks Author and then dumping that into Calibre?
No, but here’s why. Until “The Serving Church” which I just uploaded, I didn’t have any luck formatting the print books in anything other than Word. My copy of Word is powerpc only, so I couldn’t upgrade past snowleopard and thus couldn’t get iBooks Author.
Since I’ve cracked the nut of using Pages to format for print, now. I’ll upgrade to mountain lion soon.
Paul
Hi there does this work for books with images involved?
Thank you the advice given here has saved me a ton of time!!
Graig
Wow, thank you for this! You wouldn’t believe how long I searched the internet to find something that actually worked! And I was just about to pay someone to do it for me! Thank you!
Unfortunately I want to publish a book on photography and I only use a Mac
http://www.facebook.com/photo.php?fbid=10153586589629414&set=a.179572069413.152967.604489413&type=1&theater
Michael, I only use Mac. So this advice should work for you.