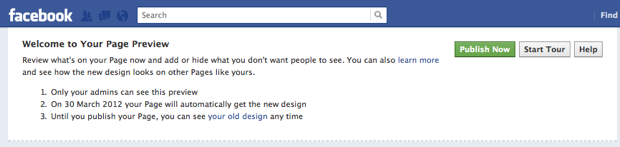
If you’re an admin of a Facebook page (for your church, club or business, etc.), you’ve probably noticed the big bar on the top of your page telling you that come the end of the month (that’s the 30th March 2012 for people reading this in the future!) they’re going to change the look of Facebook Pages.
To get ready for the change (or so you can publish your great new look page NOW!) here are some quick design tips you’ll find handy:
The Cover Image
This is probably the biggest change design wise for the new look of Pages. Recently introduced to ‘profiles’, cover images (the big top banner image) are now coming to Pages.
The size of this image is 850px x 315px. Facebook has some strong guidelines about what can go in the cover image. Basically: no promos/offers and not too much text.
One tool I’ve found very handy for making slick cover images are collages from the lovely Picasa. Select some nice photos (be it 4, 5 or lots!) and choose ‘Picture Collage’ from the ‘Create’ menu. In the ‘Page Format’ area, create a custom aspect ratio of 850px x 315px and then you can choose ‘Mosaic’, ‘Frame Mosaic’ or ‘Grid’ from the top collage style drop down and have a play!
Once you’ve got the image how you like (and bear in mind that part of the bottom left are will be covered by the profile picture) create the collage and export at the correct size. Nice!
If you page is for a website, why not have a cropped screenshot of the site? Simple but effective!
The Profile Picture
Facebook Page profile pictures have often been sky-scrapers (tall images) in the past to make the most of the available area. Now Facebook is making them square!!!
180px square seems about the best size, although Facebook will resize larger image down.
Custom Tab Images
If you’ve got any ‘apps’ installed on your page (like Networked Blogs, a MailChimp sign up form or a custom app you’ve made, etc.), links to these apps now appear at the top of the page under the new cover image.
You can have up to eight buttons displayed (four on the top row and another four if you click the expandy/down arrow), although ‘Photos’ is always first and you can’t move it! Most third party apps (although not all and not Facebook ones such as Photos or Likes) allow you to change image used for the buttons.
The images are 111px x 74px (a strange size!). You can change them by clicking the expandy/down arrow on the right of the button area, then hover over a button and the pencil/edit icon appears on the top right corner of the hovered button. Click the icon and from the context menu choose ‘Edit Settings’.
In there you can choose the name/label shown under the app/button and also add a nice image of your own for the app! However, this process isn’t all that obvious!
Clicking the ‘change’ link will open a new link/tab. In there again click the ‘change’ link and choose your image from your computer. At this point, your new image should appear on the page – but I sometime get a completely different and seemingly random image appearing instead! (I also know I’m not the only person this happens to…) If you don’t get your image, try renaming it (to something strange!) and try the change/upload again. I think there must be a bug of image names clashing in Facebook’s image storage database…
Once you’ve got your image, close the tab/page that opened when you clicked the first ‘change’ link (this seems like terrible and confusing usability to me…) and your new image should now be in the ‘Edit Settings’ box.
If you’ve change the app name/label, remember to click ‘Save’ and then click ‘OK’ and your lovely new image will be on the button!
You can also change order of apps/buttons (but again NOT Photos) by using the ‘Swap position with…’ options in the edit app/button context menu.
‘About’ Information
It’s worth checking how your ‘About’ info looks. For business pages with a location/phone, etc. this information is displayed. For other page types in the words in the ‘About’ section of your page information.
Here are a few pages that I’ve updated using these techniques:
- The page for my Church – uses a four photos collage for the cover.
- The page for my Christmas information website – using a screenshot of the site’s home page.
- The page for a Health Spa client of mine – uses a collage made of 15 photos to give a overall feel of the spa services.
Have you updated your page design yet?
Do you have any other Facebook Page tips and tricks?
James Cooper
I'm a God loving, web designing (since the days of Netscape and IE5), bass, ukulele and mandolin playing, geek! Follow James on Twitter | Circle James on Google+


We are featuring our current series in the cover image… for now it seems like a good idea. Might change to something else later.
facebook.com/livingwaterfmc
Great idea Phil – makes it very current!
Thank you very much. I was having all kinds of problems getting my covers set. Here are my 2 pages. Check out the cool “welcome” tab image.
http://www.facebook.com/Fruzies
http://www.facebook.com/FrankGantzCom
Nice work Frank, glad it was of help!
Excellent article, James! Very thorough with practical tips.
Funny note: I arrived here via a twitter link and didn’t notice who the author was. As I was reading, I said to myself, “This sounds like James…”.
Be well, my friend!
LOL Steve – scary you knew it was me by my typing!!!
I’ve been using twitterfeed to auto-post feeds to http://www.facebook.com/ivietchristian.com . When I upgraded the FB page to timeline format, all the twitterfeed’s posts are grouped. I have to ungroup the posts manually.
Correction: My FB page is http://www.facebook.com/ivietchristian
All the items look like separate ones to me. 🙂
Thank you for checking. I mentioned that I separated them manually every day. 🙂 If you have a suggestion, please let me know.
Yeah I too want twitterfeed separated in to individual posts.
Rather than twitter feed, have you tried networked blogs: http://www.networkedblogs.com/ I use that and it works great. (I use twitterfeed for publishing my church’s feed to twitter but fint networked blogs is better for fb…)
I’m currently upgrading our youth ministry page but can’t seem to figure out how to “ungroup” comments left by others on our page. Any suggestions? I’d love for their posts to be seperate.
http://www.facebook.com/CatalystGB