
There are a number of features that are built into the Mac OS that have made my day-to-day blogging a easier.
One of those things is Preview.
You can easily resize and crop images for blog posts really easy. You can double-click an image and it will be opened by Preview by default, or you can use the shortcut ⌘ + O. To save some space on my server, I will often resize images to the default set on the blog I’m posting for. I’ll do this with thumbnails or fullwidth images. This can also be helpful if the image is a few pixels too short. Best of all, Preview lets you resize multiple images at once, ⌘ + A.
This has been a huge time saver, but I was a little annoyed that I had to click multiple menus to Resize my images. I wanted to create a custom keyboard shortcut, so I did a little digging around and this is what I found:
How to Create Custom Shortcuts with OS X
They make apps that can do this, but OS X has it built-in. Some apps let you manage your shortcuts, so if you really get into making your own, you may want to consider purchasing one.
For me, the OS X feature is robust enough.
Here’s how I setup my own custom shortcut to resize images in Preview:
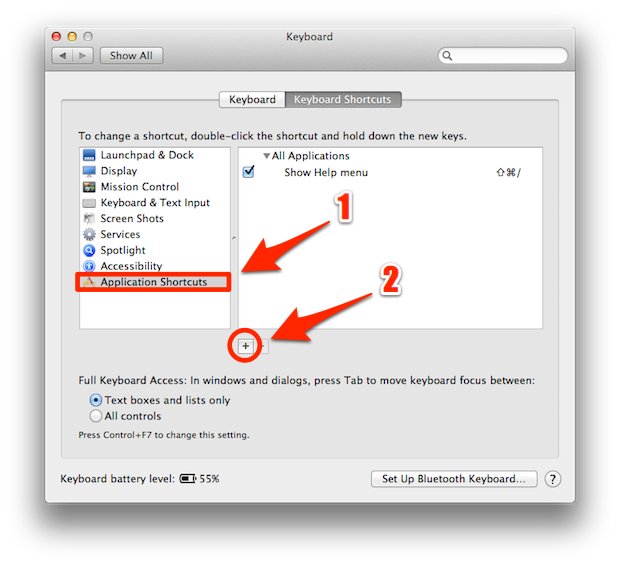
Open your System Preferences and go to Keyboard > Keyboard Shortcuts.
Select Application Shortcuts [1] and then click on the + to add a new shortcut [2]:
Next, select the application you would like a custom shortcut created for [1], type the exact name of the menu command [2], and then finally, add the keyboard shortcut of your choice [3]:
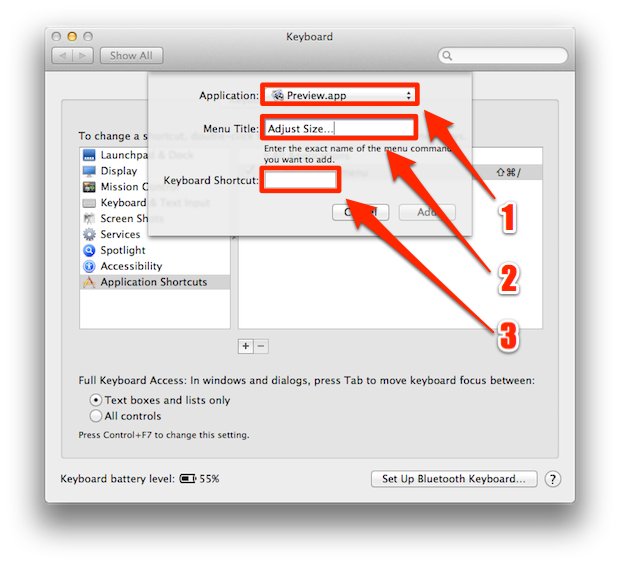
Yes, it’s that easy.
I’ve been using my new shortcut for about a week, now, and love it!
Now, what others could I add?
Have you set-up a custom shortcut before? Would you like to?
Tell me about it!
[Image via jDevaun via Compfight cc]
Eric Dye
Support Lead at Valet, and Proprietor of DYECASTING. Human by day, gamer at night, lover of coffee, and all things spicy.


Speak your mind...