I love my daughter Ally. She takes after me in so many ways, particularly when it comes to the sarcasm/humor front. She also serves as a model for me whenever the creative juices strike and I want to try out something new with regard to photography.
So I wanted to see what I could do if I needed to use my home office as a makeshift studio space. The room is quite large as it is more a multi-purpose room than a regular bedroom. Still, it was going to be a challenge because it’s not a wide open space.
My goal was to capture a classic kind of casual/beauty image. I also needed to do something to the back wall which was acting as my background. The paint in the room is a very subtle cream color. I knew if I positioned Ally away from the wall, it would darken the background but still wanted it to be lit to create some separation. So here is how I started out:
I mounted my Flashpoint 620m on a light stand. Flashpoint is Adorama’s series of lighting equipment. It is for the budget minded photographer who still wants more power than a speed light. I like using it. I attached a 16″ beauty dish to the strobe. For the background, I simply used a Nikon SB80dx speed light and zoomed it to 105mm to create a more narrow beam of light on the background.
With that in place, I started to shoot and then changed and added some things. I had the strobe positioned relative high up and it was causing a harsh shadow. So I placed the diffuser over the beauty dish which softened the light and the shadow. However, the left side of Ally’s face was too much in shadow. So I grabbed my big reflector, put it on the silver side and placed it in my office chair just outside the frame. The silver reflector bounced just enough light back on to her face and gave it just enough of an “edge.” So in the end, the setup looked like this:

Then it was a matter of getting her to play along, firing off frame after frame and getting her a little comfortable.
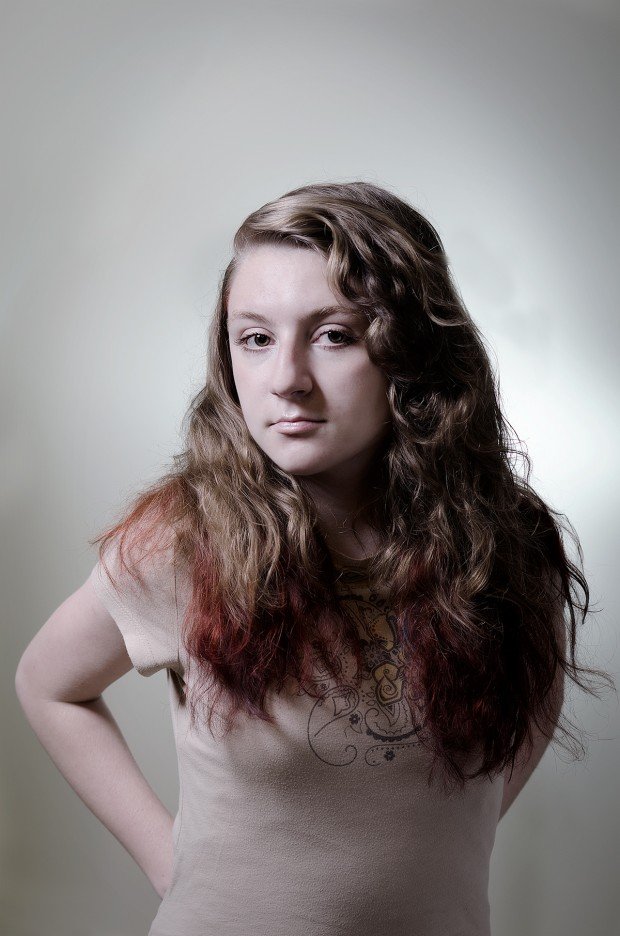
This one happened to be one of my favorites:
For post processing, I used a combination of curves to boost contrast and then used the channel mixer to convert the image to black and white.
Using the soft light blending mode, it created an image with a more stark view in the contrast and punchier colors.
I then used another channel mixer layer, converted to black and white again and then lowered the opacity to get the slightly desaturated look you see here.
In a future post, I will do a video showing how I did the post processing.
More to come!
Jay Caruso
I am photographer. I love my wife and kids immensely. I have a personal relationship with Jesus Christ, my Savior. I was an IT Director and Project Manager for 10 years. Now I am a Senior Logistics Analyst at The Home Depot. I love the sport of baseball and the New York Yankees.


[…] few weeks ago I wrote a post about a portrait I made of my daughter Ally. I described where and how it was made, including a lighting diagram as […]