[Editor’s Note: This is part 1 of a 4 part series: Podcasting Sermons]
Many Churches are putting their sermons online, but if you’re not a geek or very techy minded, it can be a scary thing!
In this four part series, I’ll be explaining the whole process. From the recording of the sermons, editing sermons and ‘MP3-ing’ them, putting sermons online, and then making them available to the whole world on a website and as a podcast through a feed at the iTunes store!
So, let’s start at the beginning, recording sermons.
Recording Sermons
There are different ways of recording sermons, including recording onto CD, using a digital recorder, recording straight into a computer and using a good old cassette recorder!
Recording onto CD
If you use a CD recorder in the Church for recording the services – great! To edit the CD (e.g. extracting just the sermons/readings) you’ll need to ‘rip’ the CD in a computer. Programs such as Windows Media Player (WMP) and iTunes (my favourite) can do this.
When ripping CDs, for this purpose, I recommend that you rip it to a .wav (PC) or .aiff (Mac) file. Warning: these files will be large (500mb+ for your average CD), but you will get the best quality for editing.
- How to import a CD into iTunes (For how to set the import file type in iTunes, see the ‘convert file’ link for iTunes below.)
- How to import a CD into Windows Media Player.
When you’ve got your big file, from the CD, you’re ready for editing!
Using a Digital Recorder
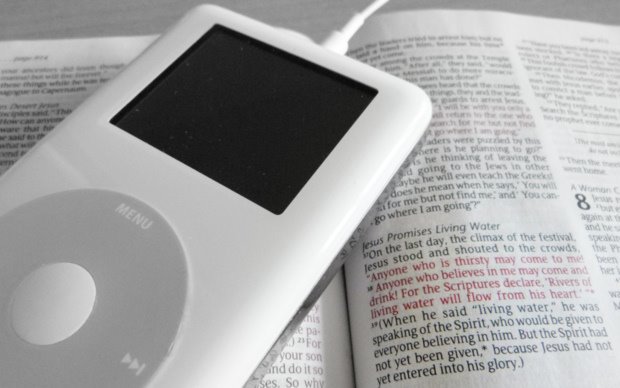
I use a digital recorder for recording sermons at my Church for podcasting. Some MP3 players have a built it ‘line in’ feature and you can use this to record the sermon. You can also get adapters that allow ‘line in’ recording into an iPod/iPhone.
Many small dictaphones have good line in recording facilities. I use an Olympus VN-5500PC for recording in my Church. (The VN-6000 is the current equivalent of this model.)
If you want to do really serious digital recording, M-Audio, and Zoom have some excellent (and sometimes expensive!) recorders.
The best way to use a digital recorder is to plug it into an output on a mixing desk. Most mixing desks have ‘aux’ or ‘send’ outputs. If you can plug the recorder into one of these, you should get a good quality. You might need some adapter cables to make the connection. It’s hard to say what you’ll need because it depends on how you’re going to be plugging it in! Some line ins (and digital recorders) can be rather sensitive, so demo recordings are a must!
Digital Recorders ‘encode’ the audio into a variety of formats including MP3, WMA (Windows Media Audio) and WAV.
You’ll firstly need to download the file from the digital recorder onto your computer (normally done using a USB cable).
If you’ve got a WAV file, you’re ready for editing (and the next ‘Editing’ post in the series)! If you’ve got an MP3 or WMA file, it might well be worth converting them to a WAV/AIFF so you get the best quality audio for editing.
You can convert the files in a similar way to the CD using Windows Media Player or iTunes. I can’t find an easy way to convert file types within Windows Media Player, if you know of a way, please leave a comment!
How to convert a file in iTunes. I think iTunes is the easiest way to do the conversion. (If you’re on a Mac and have WMA files, you can use the free Miro Convertor to convert them to MP3s that Garageband can edit – this is what I do!)
Once you’ve got your WAV/AIFF (or MP3) file, you’re ready for editing.
Recording Straight onto a Computer or using a Cassette
These methods are could be seen the most ‘techy’ (recording straight in) and the most basic (the tape), yet strangely there are quite a few similarities between them.
For both, you will need a way of getting the audio into the computer. Most computers/notebooks have ‘mic’ sockets on them. You can use these, but they are normally only mono and the quality can be rather ‘buzzy/crackly’! If your computer has a ‘line in’ socket, this is much better and they’re often in stereo. These sockets are normally 3.5mm/ 1/8″ (headphone size).
Other alternatives include soundcards (where you take the computer to bits to install them!) and external USB and FireWire ‘audio interfaces’. These will often give you better control and quality but can cost more.
One of the most popular, and simplest, external ‘boxes’ is the Griffin iMic. It’s got in and out 3.5mm jacks and plugs into the computer by USB.
Behringer also make a simple and very affordable USB interface which has got RCA/ Phono imputs rather than a 3.5mm jack. This could be just what you want if you’re connecting from cassette desk or stereo output from a mixing desk. The Behringer UCA202.
You can also get a USB Cassette Decks like the Ion Tape2PC Deck and Cassette to MP3 convertors like the Ion Audio USB Tape to PC.
If you want to push the boat out a bit, there are many excellent interfaces by M-Audio, PreSonus and Behringer.
Again, you’ll need some cables to connect things. But without know what you’re plugging from and to, it’s hard to recommend things.
To record either directly or from a tape, you need some software to capture the audio.
Audacity is an excellent free program for Windows, Mac and Linux that will do the job really well. If you use a Mac, Garageband is also a good option.
You need to either play the tape, or get the direct line and record it ‘live’ into the software. This is a good guide for Audacity.
These are good basic guides for Garageband: Configuring iMic, but it’s the same for most audio inputs; Basic recording in Garageband.
If you have to use the ‘mic’ socket, especially in Windows, be careful with options such as ‘microphone boosts’ as this can lead to distortion!
When you’ve recorded your tape/direct line, you should have a nice file (it’s a good idea to save it as a ‘project’ in either Audacity or Garageband) that’s ready for editing.
James Cooper
I'm a God loving, web designing (since the days of Netscape and IE5), bass, ukulele and mandolin playing, geek! Follow James on Twitter | Circle James on Google+


I was hoping you might have gone into more detail on recording settings on a digital voice recorder.
I use an Olympus WS-500M plug directly into our mixer. The default is highest quality stereo, which with my set up records on a single channel (i.e. only on the left speaker when you listen back). So I just had to use HQ, which records over both.
Anyone have other suggestions on settings? Such as low-cut filter, sensitivity, etc?
Thanks for your comment Joel. It’s tricky to recommend too many settings as, in my experience, mixers (and digital recorders) can be very different beasts when it comes to outputs/sensitivity.
Overall I’d say ‘go low’! If possible use a proper ‘aux’ rather than a ‘send’ or headphone socket. Headphones can sometimes sound ‘muddy’ and the volume on sends can be quite loud. The digital recorders I’ve used seem to ‘peek’ with pretty low volume input (so you get nasty scratchy or crackly noises). So with tests, I’d start low and work your way up in volume (and you can amplify the volume when editing…).
On the desk I use the aux volume is set to about 45% and the mics to about 40%. We tend to cut the bass on all the mics on the EQs on the church desk anyway (to stop the PA booming) so that comes through to the recordings as well!
Great point about the mono/stereo. Again that’s something to check! The recorder I use does stereo on all the settings…
Great article. I actually wrote a book on podcasting for churches called “Podcasting Church” (at podcastingchurch.com. If anyone is interested, I’d like to offer a copy of the book (autographed paperback) to people who comment on any of the articles.
Paul
I should clarify that I’ll give away one copy to one of the people who comment on any of the posts in this series unless the site owners aren’t interested. Just trying to help.
Another note – line-in on almost all sound cards is stereo whereas many people will be using a mono out (especially in many analog systems I’ve seen). You will need a mono to stereo conversion cable. Otherwise the plug bands won’t line up. Bear in mind, it’s not true stereo – the cable just duplicates the mono signal on both the left and the right channels.
Great point Greg!
If you want to skip the WAV/AIFF step on the Mac, I’ve found Rogue Amoeba’s Fusion convenient for doing “lossless” MP3 editing. And while you’re purchasing it, you can bundle their “Audio Hijack Pro” for digitizing from cassette or recording directly to computer.
That looks really interesting Bruce. Here’s a link for anyone who’s interested: http://www.rogueamoeba.com/fission/ I’ll have to download it and have a play!
this is great and very timely for me… I’ve been wrestling with how to change our current set-up. We have been using Garage Band for a long time. However, with a rotation of volunteers running the computer it seems to be a little too complicated for some of the volunteers and that has resulted in about a 50% success rate.
I’m intrigued by the digital voice recorders that plug directly into the board… AND it seems like some of them have an auto start feature. It seems like this could be a good solution for us.
That’s cool. Make sure you check out the other three parts! The Editing post is up now.
Thanks for this article…
Good news: I have a funding source (though not a bottomless treasury) who wants to see 1,500 sermons digitized and made available online and possibly in hard copy for pastors in third world countries.
Bad news: Although I am fairly adept at figuring out techie things on a need to know basis, I am a little confused as to where to start this daunting task of converting my 2 huge bins of 30+ year old master cassette tapes.
Questions: IF YOU were to start this project 1. what equipment and 2. software would you purchase, keeping in mind that I may have 2 or 3 people to help (though we don’t live near one another). 3. Where might I upload the sermons to make them available to the widest audience – like I said, NA and overseas in India etc.?
THANKS for any feedback you or anyone who reads this might have for me.
Hi Maggie,
That sounds like quite a project! I’ll do my best to give you some hopefully helpful pointers…
On 1 (equipment): You’ll need some form of tape to usb input. You can get simple ‘walkman’ type players that have a usb output:
http://www.amazon.com/Arrela-Portable-Cassette-Converter-Headphones/dp/B00KKIATEE/
Or if you’ve got a tape deck, then an ‘audio interface’ might be better like:
http://www.amazon.com/Sabrent-External-Adapter-Windows-AU-MMSA/dp/B00IRVQ0F8 (should be ok although sometime the mic imputs are a bit rubbish on these cheap ones!)
or
http://www.amazon.com/Behringer-UCA202-Audio-Interface/dp/B000KW2YEI/ Behringer are a top brand.
For 2 (recording) the free Audactity will probably be all you’ll need. It’s free and works great (as per part two ‘editing’ https://churchm.ag/podcasting-sermons-editing/).
Another thing you’ll need is ‘time’! When importing cassettes, they have to be done at ‘real speed’. So if a sermon is 30 mins long, it will take that long to ‘play’ into the computer…!
3 (Where to put them) is the most complicated… you won’t have a ‘normal’ podcast (where things are put out weekly and are likely to be listened to as such) but rather an audio ‘archive’.
I’m guessing you might also want to have some more organisation over the files (speaker/topic/year, etc.).
For podcasts, CM loves http://www.buzzsprout.com and we host our podcast with them! It does cost (http://www.buzzsprout.com/sign_up) and you can embed your items on other sites or you get a ‘mini’ site (like http://churchmag.buzzsprout.com) where things are listed in dated order but there’s no other way of ‘grouping’ items on the mini site.
So here are some other options…
YouTube
Yes the video site! It is possible to upload audio files with a single ‘image’ and have them on YouTube.
Do it yourself: http://support.google.com/youtube/answer/1696878
or there’s services like: http://www.tunestotube.com which combine your mp3 and an image for you.
You can have ‘playlists’ to help organise things.
SoundCloud
This is sometimes called ‘the YouTube of audio’ and it kind of is! You get an account where you can upload audio and put them playlists/albums. You get 3 hours a month of upload free or pay for more…
http://soundcloud.com and http://soundcloud.com/pro
Archive.org
This allows you to upload audio for free! You can also have topics to help orgnaise things, like this church account (I don’t know anything about this church it’s just an exmaple!) http://archive.org/details/@bethanybaptist
Your own site
If you want more control about how things are displayed, you will need your own website. WordPress would be a good choice for this (either an account on wordpress.com or a host it yourself site using wordpress.org)
Then you could make each sermon have it’s own post and can use categories and tags to help organise things…
However, you’d still need some where to host the audio and you’d then embed the player in the post(s). You could embed from youtube, archive.org, buzzsprout or soundcloud. Or use the Amazon S3 hosting to host the audio (although that can get a little geeky).
I think SoundCloud or archive.org are probably your best options if you’d like to keep things simple!
I hope that helps. 🙂
Thank you SO very much! This provides me the ground level information I needed to get started. I appreciate the time you took. All the best!
Great! Happy tapeing 😉