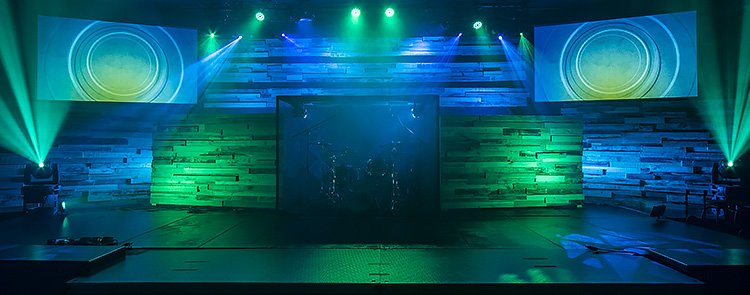
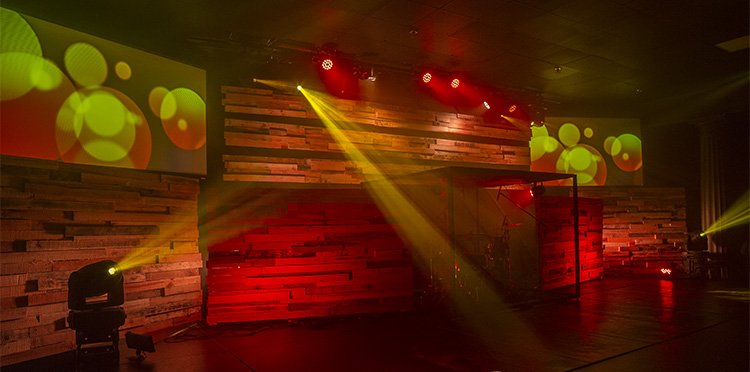
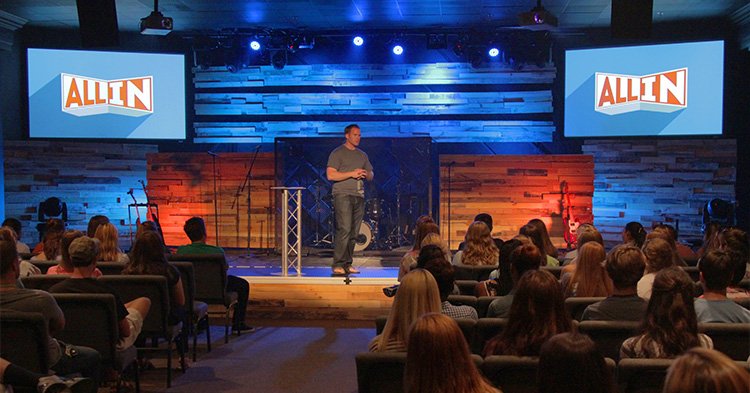
If you’ve peered into the world of stage design recently, there’s a good chance you’ve seen a number of sets built out of reclaimed pallet wood, and with good reason. It gives spaces a warm, earthy feel. Pallets are easy to come by. The wood is cheap (sometimes even free). Construction is quick and straightforward. After four years of all white Coroplast and cardboard sets in our student ministry space, I decided it was time to build one of these sets. I learned a number of things along the way, so if you’re considering building one of these sets for your next design, here are some helpful tips to keep in mind.
1. Have the right tools
This is true of any project you might embark upon, but is particularly important when it comes to construction. If I had to put this set together with hammers instead of a nail gun, this set would have easily taken two weeks to build. If you are planning to build a reclaimed wood set, I recommend having the following tools:
- Reciprocating saw (aka sawzall). Cutting the nails between the boards on assembled pallets is the quickest way to disassemble them.
- Mallet. This will also help loosen strong nails on assembled pallets without breaking the wood.
- Miter saw. For cutting your reclaimed wood.
- Nailgun. This is what you’ll use to secure the wood to your frame.
- Claw hammer. For the occasional stubborn nail.
- The usual suspects. Measuring tape, pencil, gloves, and safety goggles.
2. It goes faster than you might think
I was a little nervous before this build because I was fairly short on time with our kickoff rapidly approaching. I was surprised to find that the entire set came together in three days, and if I had been in a rush, it could have been done in a day and a half. The first day was spent using a sawzall to deconstruct our 30 pallets. Day two was spent constructing our four stage panels. The last day was spent building the extra wide wall panels overhead.
3. It’s cheap, maybe even free
We were able to find our pallets for for free from a local warehouse on Craigslist. Do a little research and you’re sure to find someone in your area that’s looking to get rid of some pallets.
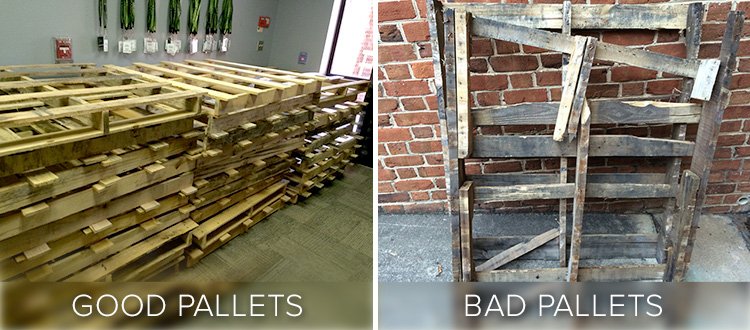
4. Pallet quality matters
We got our pallets from two different locations. The first place had very nice oak pallets. Excellent quality wood and the pallets were well-assembled. That was not the case with the pallets from our second location. The wood was cheap and had been reused a number of times, which the constructor made up for by using three times as many nails and doubly reinforcing the center crossbars. This resulted in pallets that took three times as long to cut through for wood that we ultimately couldn’t use because it was in such poor condition.
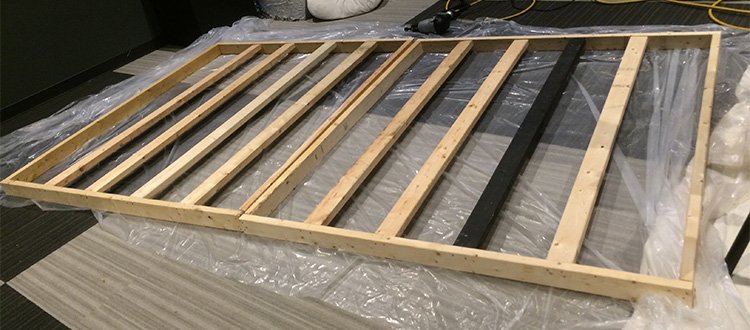
5. Build extra studs into your frame for flexibility
We built our first frame with only three 2×4 studs in the center of our 8 foot frame. This turned out to be pretty inflexible in terms of where we were able to secure our wood. Depending on the width of your frame, make sure to build in 2-3 more studs than you normally would in order to give yourself room to secure the pallet wood in a number of different places.
6. Watch your widths
Make sure all the wood in each row is approximately the same width. Once one row is uneven, the problem continues to compound itself until you wind up custom cutting some pieces or having a severely crooked set piece.
7. Be safe
Your final product will be heavy. Make sure to secure it properly and safely, as well as flattening any protruding nails, to make sure no one gets hurt. It’s also worth mentioning that you should take your design plans to your local fire marshal to be sure that your stage will be up to code.
Conclusion
Are you thinking of building a reclaimed wood set? Already built one that you want to share? Post a link to your own photos or ask questions about this build below in the comments!


Chess Hoyle
Chess is the Production Designer for Advance Student Ministry at Forest Hill Church in Charlotte, NC. He loves all aspects of live production, as well as graphic design, video production, and photography. Chess shares his home with his lovely wife, Leighanna, and their dog, Sarge. You can find him online at aisle7studios.com.


Looks fantastic, Chris! Thanks for the suggestions. I have been looking at building a pallet design for our youth. Definitely bookmarking this for when I get around to it.
Looks fantastic, Chess! Thanks for the suggestions. I have been looking at building a pallet design for our youth. Definitely bookmarking this for when I get around to it.
Thanks Vince! This is definitely a quick and easy build as long as you have the right tools.
This was amazing! 😀
This set looks unbelievable! I want one for our church. Alas, I’m not in charge and I don’t have any experience with a saw. Perhaps if a church’s youth group were directed by a volunteer handy man, they could turn a pallet set into a service project? Secretly, I want this for my living room to have house concerts!
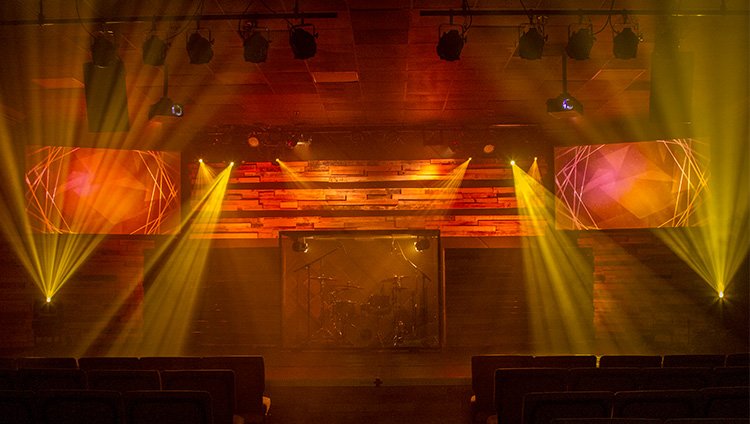
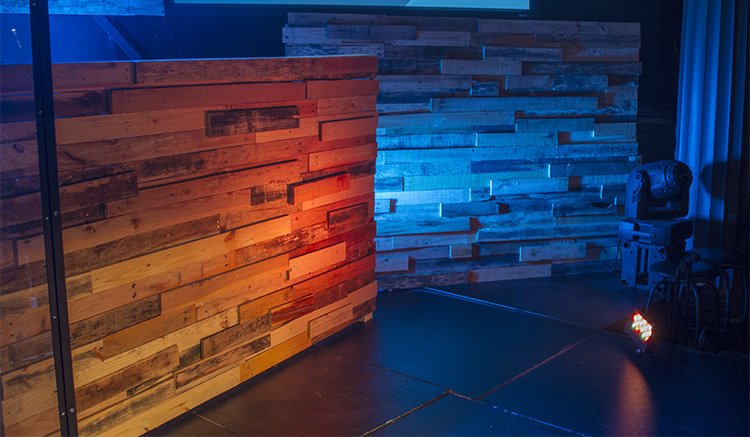
You can definitely do it, Lauren! I’m the farthest thing from a handyman there is. While I was working with a very handy partner for the larger set, I was able to build the smaller set (the final photo in this post) by myself. Just build the frames and start nailing wood on. I’d be happy to provide you with a few more in-depth step by step photos if it would be helpful.
This looks awesome – very creative and love the price point as we are a church plant! I’m curious about the base of it. How did you stand them up in a way that makes sure they won’t fall over? We have to set up and tear down each week, so we might have to make smaller panels that wouldn’t which as much but this is a great idea.
We built an A frame behind it (very simple, just two or three 2x4s) which we weighed down with sandbags. We had considered putting our panels on casters, but decided not to because we didn’t have much of a need to move the panels around. Keep in mind that if you do put it on casters, you would need to build some sort of a counter weight on the back to make it more stable.
very interested to know more about the drum cage in this picture. Was this made or purchased?
Hey Joey! That was a custom build made of a 1 inch square tubing system that is normally used to make trade show display cases, 1/4″ polycarbonate walls, and a wooden roof with sound treatment. You can see a few more close-up photos of it here.
I’d be glad to answer any questions about it you have!
This looks great! Did you have to stain or paint any of the pallet boards to get your look?
Nope, we put them straight up from being disassembled. If you have a wide enough selection of pallets to choose from, you’ll find there’s enough diversity in the colors that you don’t need to stain anything.
We built a pallet wall for our youth room and the fire marshal gave us 30 days to remove it.